Create your Outseta account
You can sign up for a 7-day free trial of Outseta here: https://www.outseta.com/get-started
Once you're in Outseta, you'll immediately see our setup guide. Complete steps 2, 3, and 4, and then come back here an continue on to installing Outseta on this template.
Install Outseta on your site
Update the Outseta script in the <head> of your site
In Webflow, go to Project settings > Custom code. You'll see that there's already a configuration and script reference in the Head code section. All you need to do is replace [YOUR-OUTSETA-SUBDOMAIN] with the actual subdomain from your Outseta account. You can find the subdomain by looking at the URL bar when you're in your Outseta account, or you can just grab the quick start script by going to Auth > Embeds in Outseta.
Here's what it looks like:
<!-- Outseta configuration -->
<script>
var o_options = {
    domain: '[YOUR-OUTSETA-SUBDOMAIN].outseta.com',
    load: 'auth,customForm,emailList,leadCapture,nocode,profile,support'
};
</script>

<!-- Outseta script -->
<script src="https://cdn.outseta.com/outseta.min.js"></script>
Embed sign up, log in, logout, and profile
This is already done for you in the template. Sign up and log in have their own dedicated pages. Log out and profile are pop up links inside of the account dropdown in the navbar. The account dropdown is only visible if you're either in the Webflow designer, or logged in to the site.
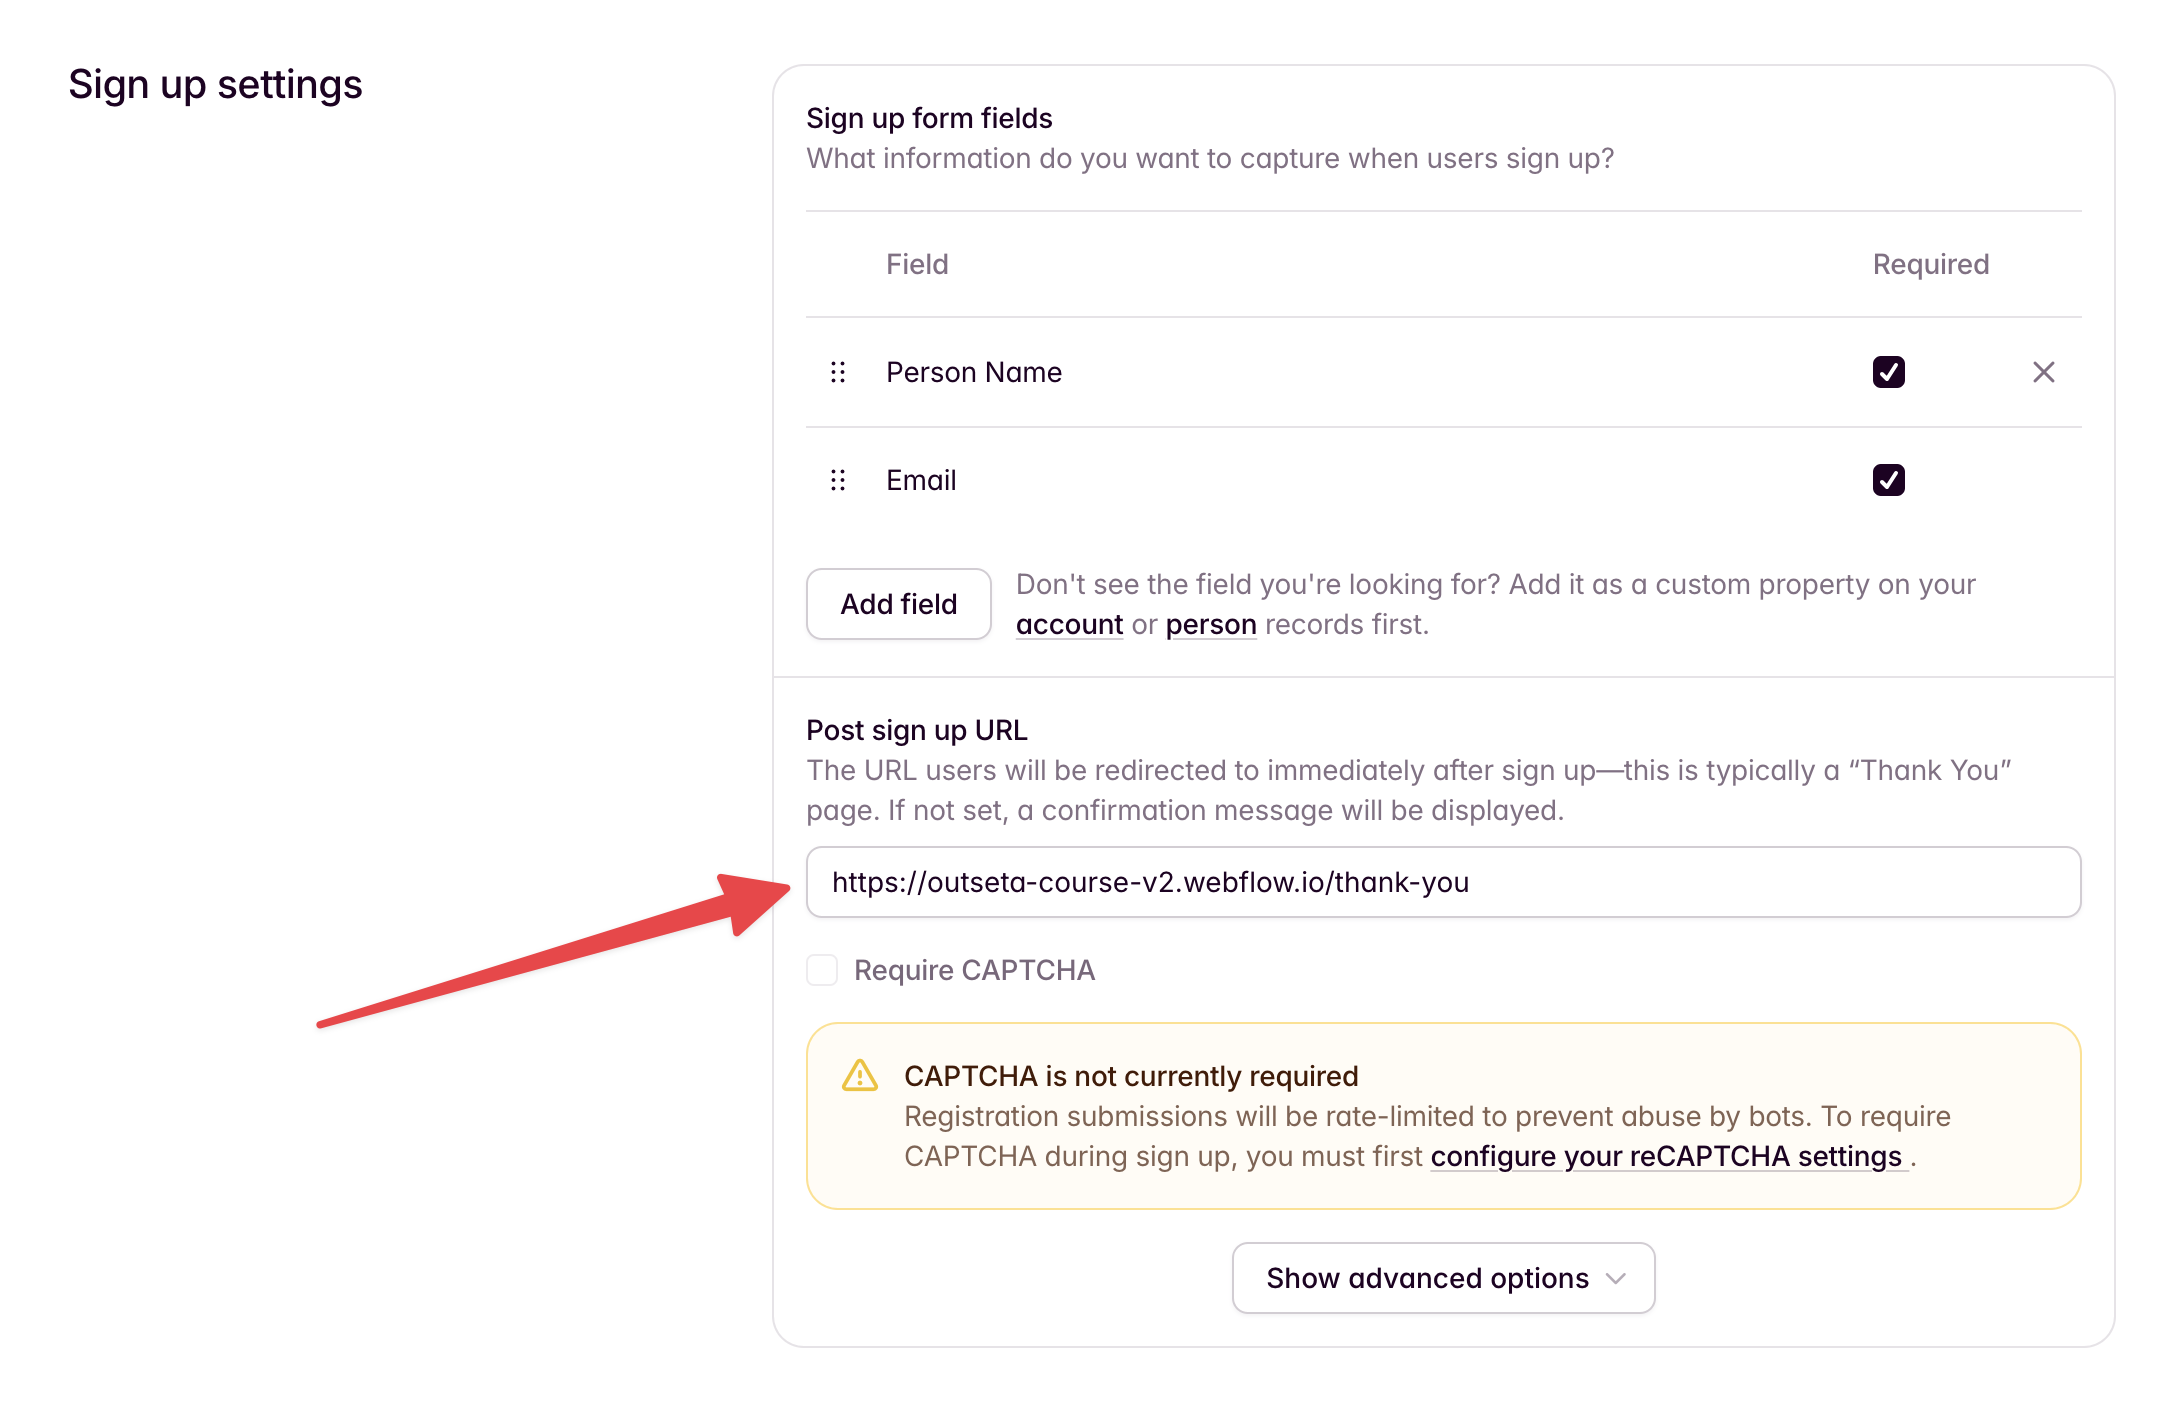
Set your Post Login URL and Post Sign Up URL
Go to Auth > Embeds within Outseta. Set your Post login URL to "https://yourwebsite.com/dashboard", which is the page in this template where users should land when they log in.
If you're building/testing on the Webflow staging subdomain, use that domain for now, and remember to change this to your custom domain when you go live.

Set your Post sign up URL to the "Thank you" page. This is where users will be redirected immediately after they sign up. The "Thank you" page is typically a page that let's the user know they need to check their email to verify their account and login. We've included this page in this template.
Again, if you're building/testing on the Webflow staging subdomain, use that domain for now, and remember to change this to your custom domain when you go live.
Add mark as complete functionality
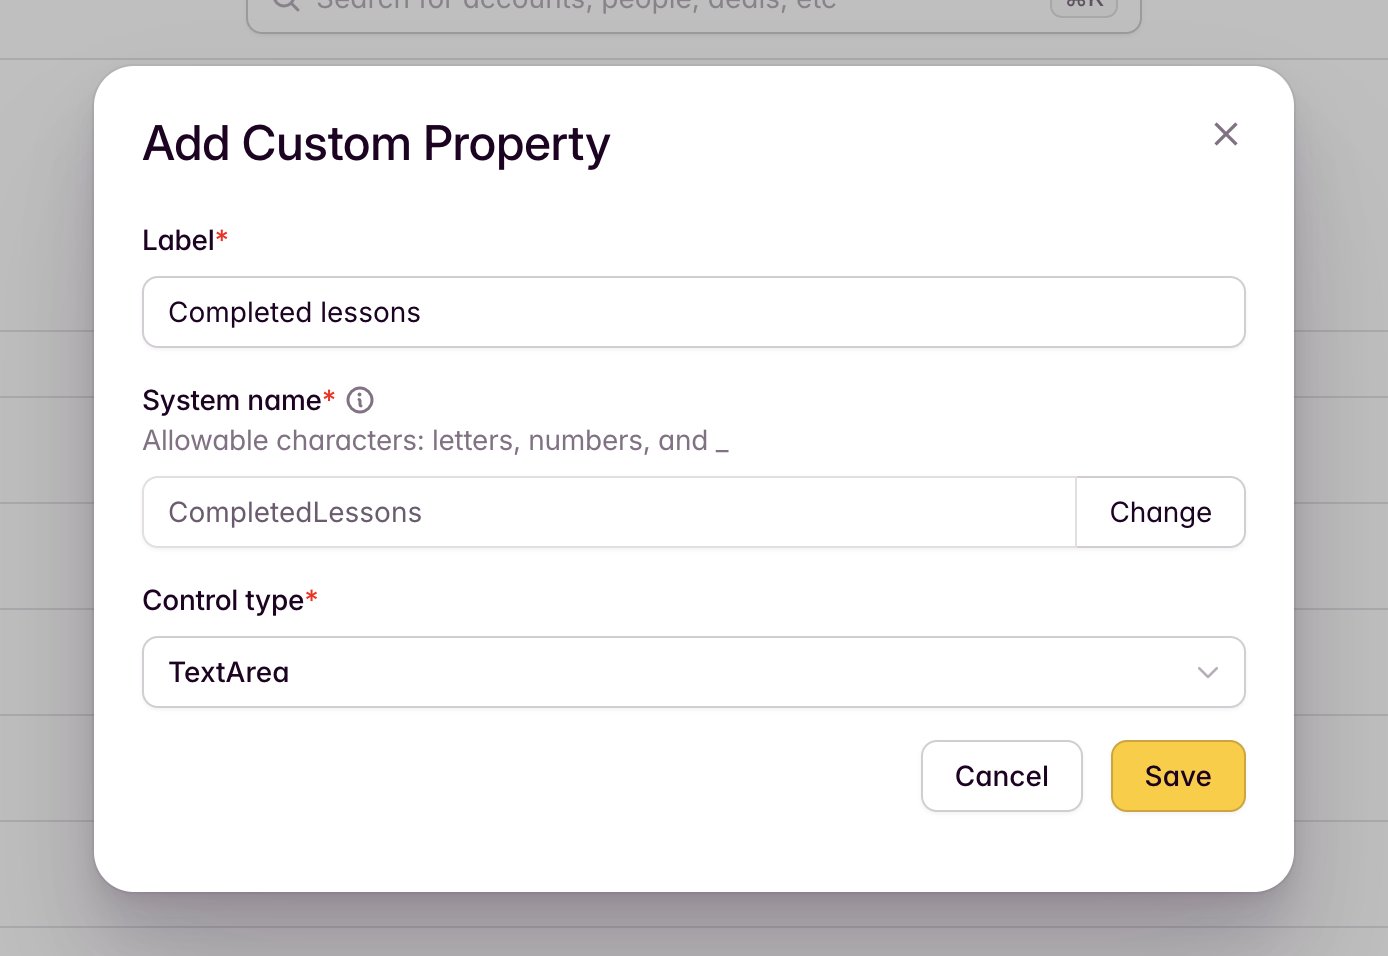
Add a custom property that will store completed lessons
In Outseta, go to CRM > Custom properties and go to the Person tab. Add a property and name it "Completed lessons". Change the "Control type" to textarea. It's important that the custom property use this specific name, as the custom code installed on this site uses these exact system names to identify the values stored in the properties.
Features that come out of the box
This template includes several built-in features designed to make your LMS run smoothly—no extra setup required. Here’s what’s included:
Teaser content
The "Lessons" CMS collection includes a switch called “Is free?”. Turning this on lets you offer teaser content to visitors—whether that’s an intro lesson or even an entire module. Providing free content is a great way to showcase your teaching style and give prospective students a sense of what they’ll get before they commit to buying.
Protected content
For any lesson where “Is free?” is not enabled, the lesson video will automatically be protected. Users who don’t have access simply won’t be able to view it. This protection is built in—no extra configuration needed.
Custom dashboard
This template includes a basic account dashboard. Each member automatically sees their next incomplete lesson, giving them a clear path forward.
Automatic course progress tracking
When a lesson video gets close to the end (about 10 seconds remaining), it will automatically be marked as complete. A "Next lesson" button will also appear, making navigation seamless. This works with YouTube, Vimeo, and HTML5 videos.
Redirect to next lesson on login
After logging in, members are automatically redirected to the next lesson they need to complete. This creates a smooth, uninterrupted learning experience—no need for users to hunt around for where they left off.